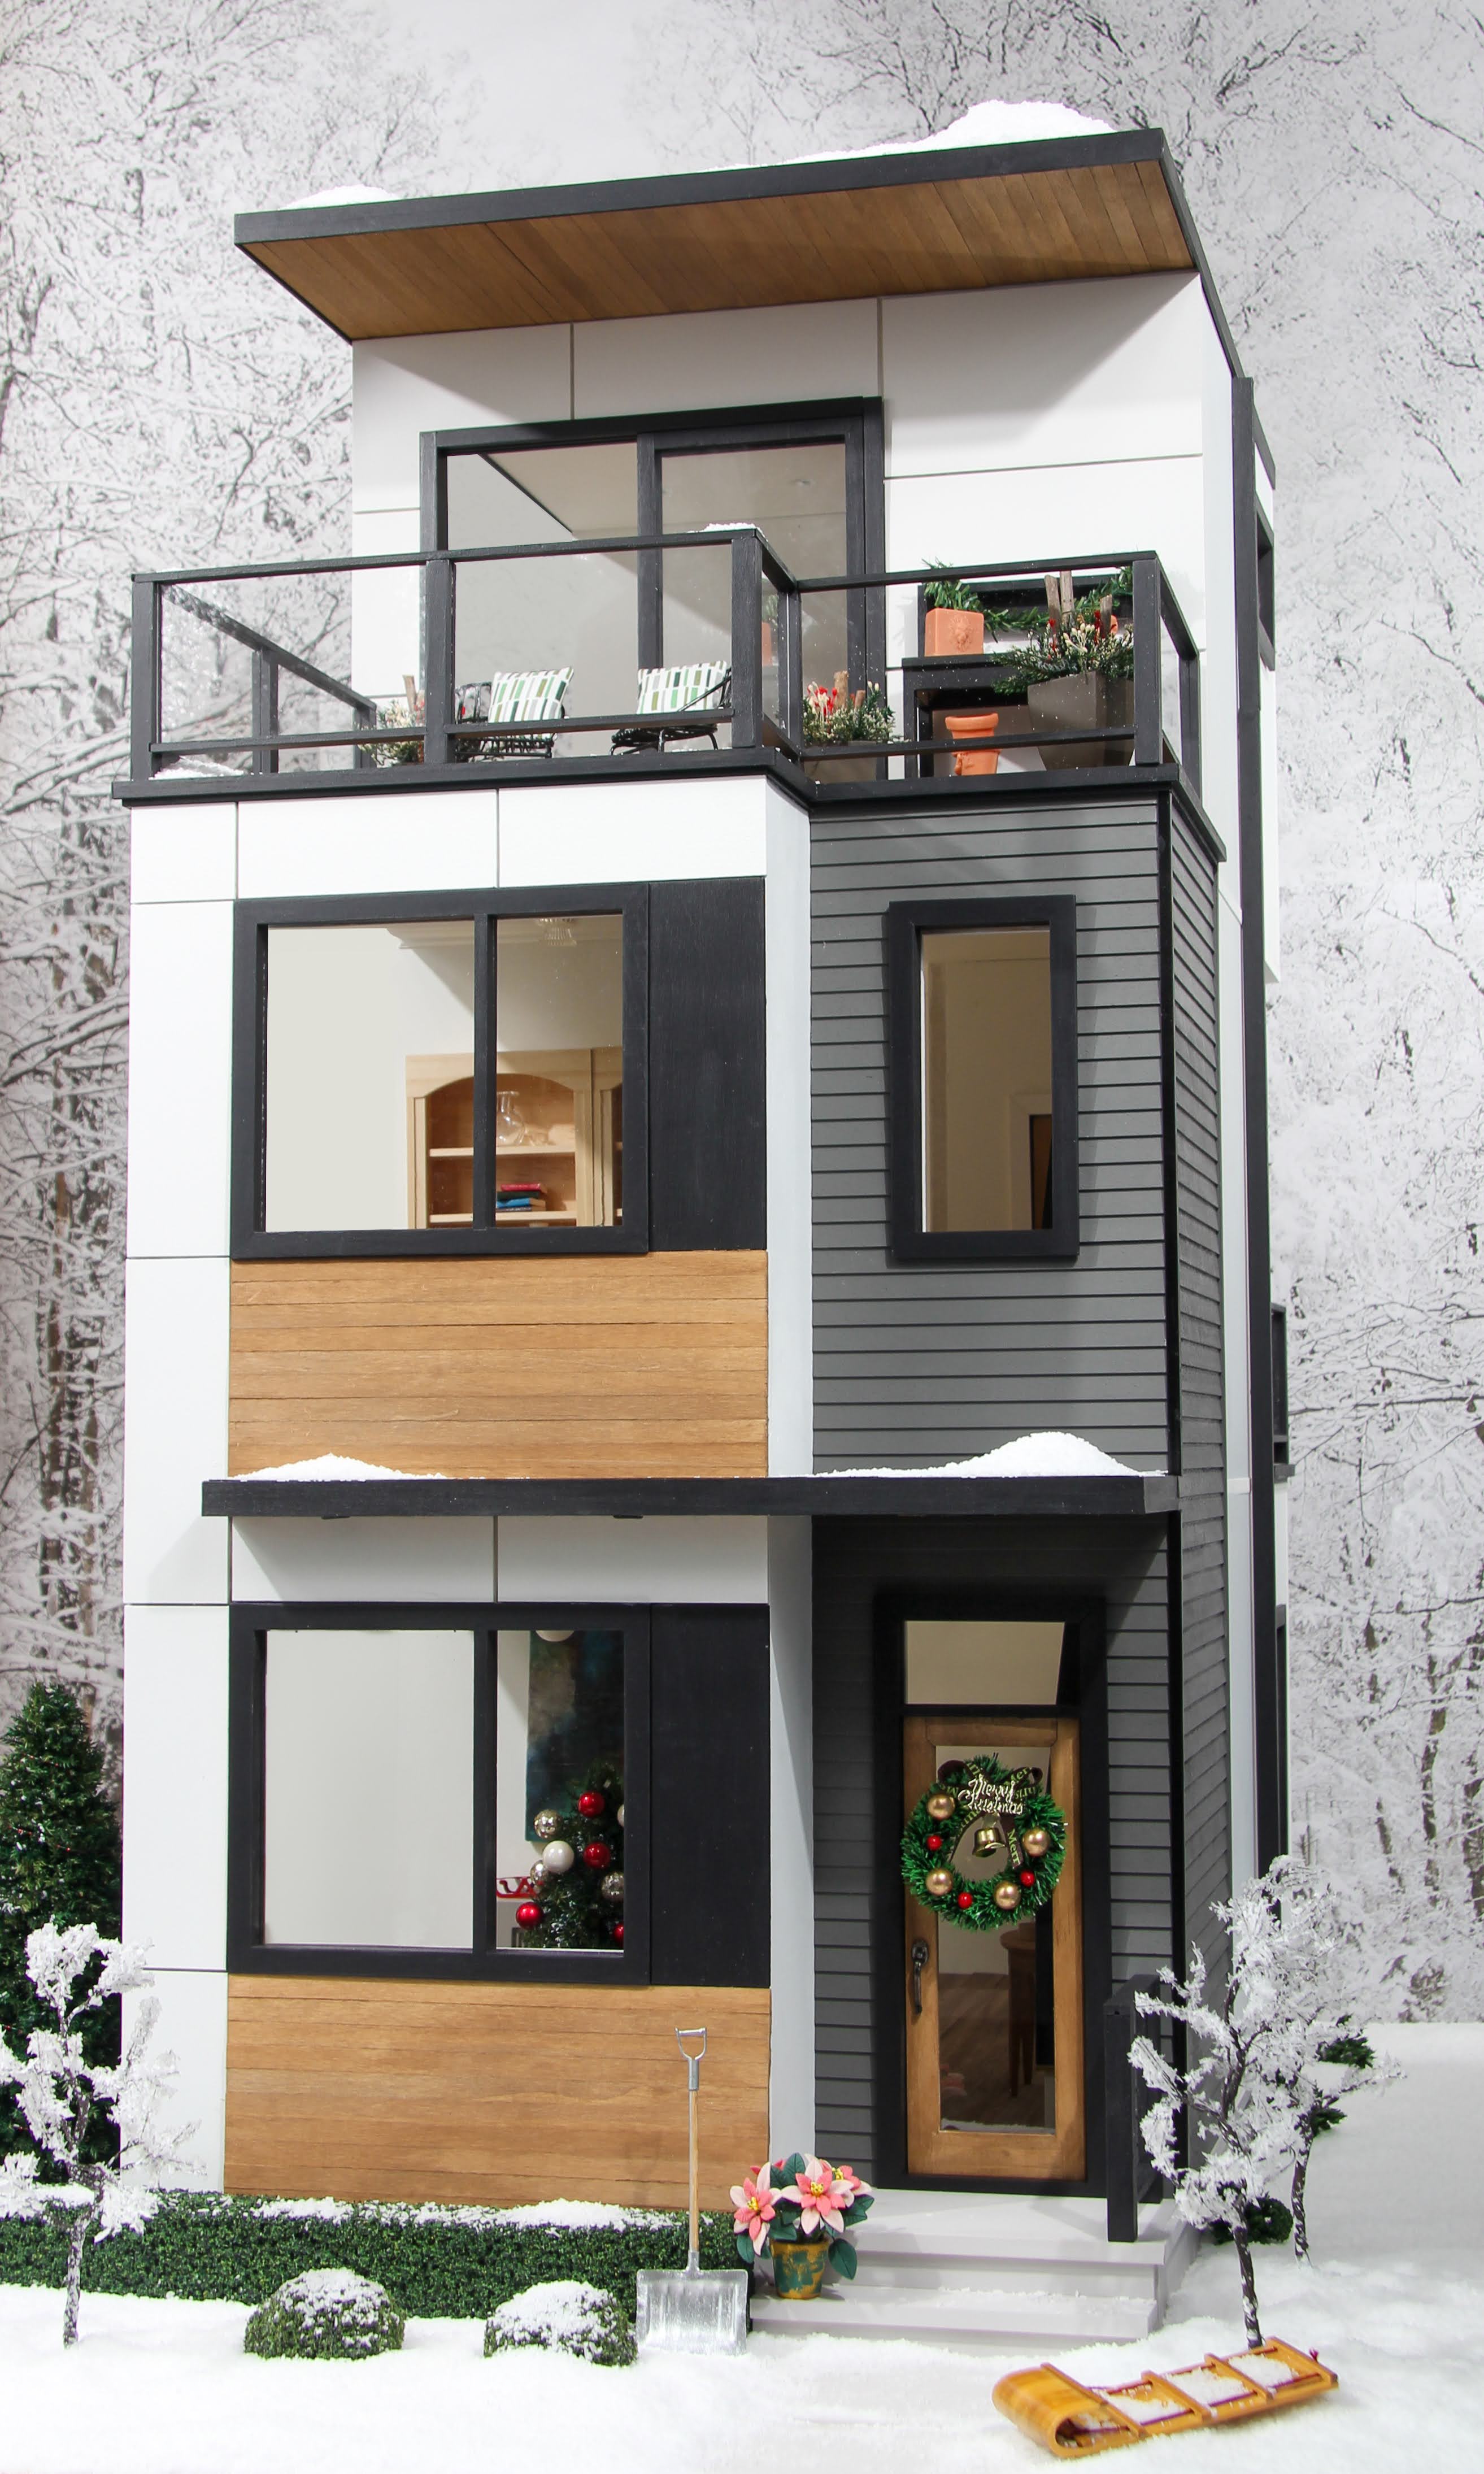
In this post we're taking an in depth look at the exterior finishes I did for my Urban Town dollhouse. I've included a full tutorial of how I finished my kit as well as printable templates to help you with yours. First let's start with the basic assembly of the kit.
Update (2025): This product was part of a past collaboration with miniatures.com. Remaining inventory was transferred to Greenleaf, and I do not receive royalties, commissions, or other compensation from it or any of the other links on this page.
Tools:
My recommended tools to complete this build:
Utility knife
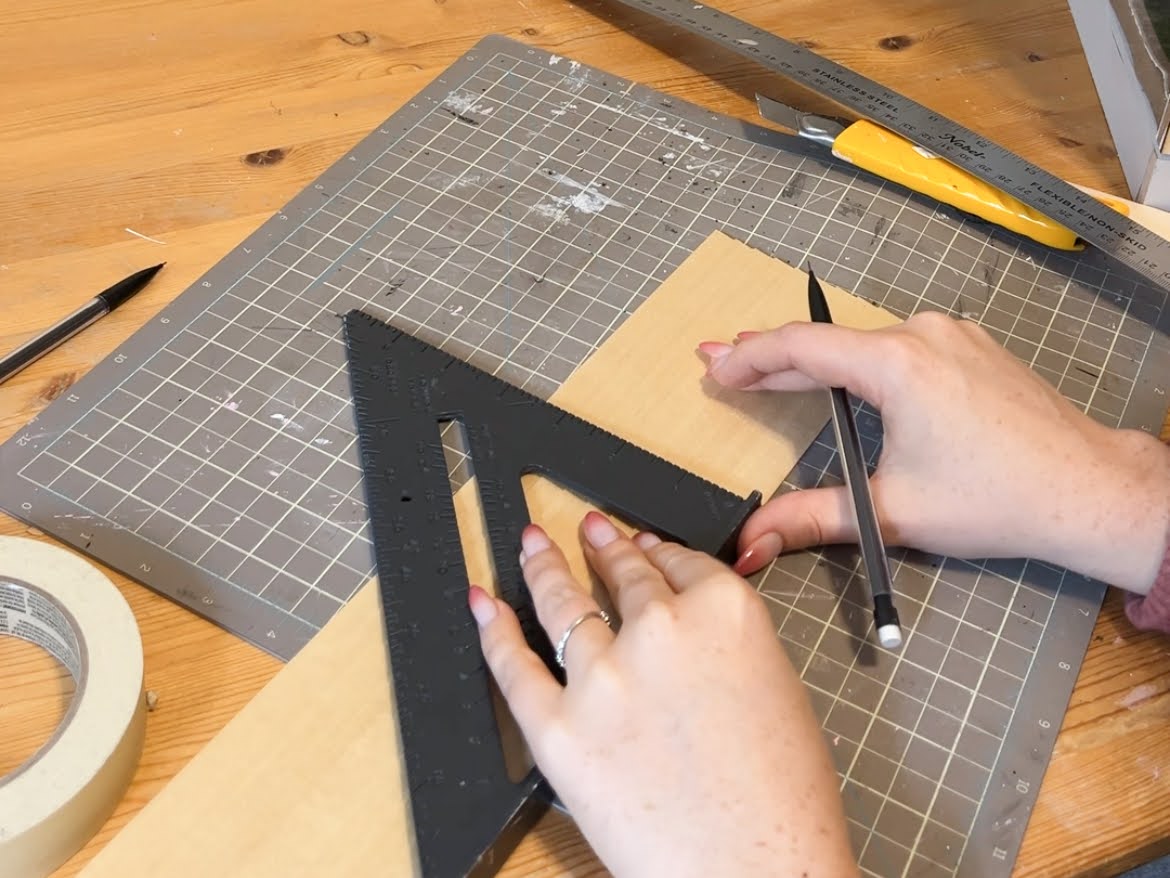
Ruler
Square
Sandpaper (or palm sander if you want to be really speedy prior to any cuts being done)
Roller paint brush
Small paint brush and/or foam brush
Nice to have
*Hand Mitre Saw and Mitre box for making angled cuts
*Small clamps are nice to have, and small pieces of wood to help flatten
*Dremel with rotary attachment for lighting
There are 10 areas we will cover:
1. Solid Colour Paneling
2. Wood Paneling and roof/floor boards
3. Siding
4. Trim details around roof edges and balconies
5. Corner moulding on corner edge of siding
6. Component assembly railing and door
7. Foundation
8. Back
9. Side
10. Landscaping
+ Paint Details and making a plan for the facade
Paint Details:
I bought all my paint from Benjamin Moore because I like the quality of the tester pots.Exterior panels and interior walls White - Oxford White (I bought this in a quart)
Black elements - Onyx (tester)
Siding - Kendall Charcoal HC-166 (tester)
Foundation, steps, walk way slabs - Cement Gray (tester)
Interior Trim Details - Chantilly Lace (tester)
Stain: Saman waterbased stain in colour Colonial
Planing out the colours and textures:
I like to see something visually before committing, so I cut and taped PAPER pieces to my dollhouse while it was in a dry fit stage (held together with masking tape). I found an image online of wood planks, some different grey tone scrapbook paper, and white printer paper. I have provided you with templates and cut guides I chose for my design, in hopes that it gives you a starting point with your layout

1. Solid Colour Panels:
Diagram with measurements and cut templates HERE. I have included a 1/16” gap between panels. You might need to make adjustments to the areas that either overlap on the sides of the house or from the thickness of the wood planks on the roof depending on your design choices.
The contemporary panels on the exterior of my Urban Town dollhouse are rectangles of basswood that are painted. I used a laser cutter to save time, but also tried a utility knife as a tech free option and it worked great.
In the end I used 3/32” thick basswood sheets. However, in retrospective 1/16” would have worked okay if you are really careful to to clamp them down during gluing stage and paint after application. That’s really important. If you paint before, the 1/16” (or even 3/32”) will warp. It is also important to consider that by adding thickness to the exterior walls your balcony railings will possibly extend out past the floor depth. You will need to compensate for this later with strip wood around the perimeter of the balcony floor.
I do not recommend using balsa sheets. When I tested balsa wood it dented too easily on the dollhouse.
Steps:
1. Sand the basswood sheets prior to cutting rectangles to create a smooth surface for paint
2. Cut out rectangles following the guides provided or according to your own design
3. Glue the panels to the dollhouse using tacky glue
4. Paint panels after glue has dried. I used a paint brush and a roller
When gluing I found it helpful to use some clamps where I could, and a small thin piece of MDF as a buffer to apply even pressure over the entire area. This isn’t necessary just helpful.
I painted the edges and tight areas with a small brush and rolled the larger areas. Then I used a small sponge brush to pat over the brushed areas to match the texture. You might need to mask off the overhang of the roof to avoid getting paint on your wood planking.
Now the exception to this is I painted the 2 black panels separately on their own before gluing them to the house. They turned out okay with several very light coats of paint using a small brush. I think this is where having a thicker basswood sheet either 3/32” or 1/8” is helpful to prevent warping if you are going to paint them while loose.


2. Wood Paneling:
I used #2388 Pine Flooring sheets on the underside of the roof, the exterior walls, and the balcony floors (This flooring sheet is a new item, much thicker than the old adhesive pine sheets, and stains much better too!) I cut the sheets using a utility knife, a ruler and a square, stained them and then applied to the dollhouse wall or floor. I wanted the planks on the wood panels under the big windows to really stand out as individual pieces. To achieve this I sort of curled the sheets when staining so that the edges were exposed and allowed stain to get in between each plank. This added some definition when it dried.For the roof, as mentioned in the best order of assembly, I suggest applying the wood sheet prior to gluing together your dollhouse. Measure out the distance from the edge of the roof to where the wall will line up (look at the grooves on the floor to help you) and cut out your floor board sheets. The exterior wall panels will hide any gaps between your roof boards and the the wall.
I will admit drilling light holes for eyelets into the roof plank sheets is not easy. The wood sometimes will split. I found it best to do this after your boards are adhered and to try and space out your eyelet holes in the middle of a board and not sort of over two. Try using a smaller drill bit than what you will need for the eyelet, and then following up with the correct size.
The raw edges of these sheets are either covered by black trim or paneling depending on the location on the house. (See Trim section).
I used Saman branded stain in the colour Colonial


3. Siding:
I used Miniatures.com Item #7036, 3/8” Lap Width Clapboard Siding. I needed almost 4 sheets for my design, and was happy to have a bit extra for mistakes. I cut the siding to fit right up to the window holes (the other option is to fit it to butt up to the window trim). This meant that my siding was seamless with my windows and had no gaps. But it also means the windows are a bit short inside. So I added an extra piece of strip wood to my window frame back side to fill in the gap.In my design the siding on the right side of the house is 6 1/2” long.
I cut out all the shapes, made sure they all fit by attaching with masking tape, and then painted the pieces. I adhered with tacky glue and used masking tape and some small claps to keep them in place while each sheet dried.
The siding is painted Kendall Charcoal HC-166 by Benjamin Moore. I finished off the far edge of the siding on the right side of the house with a 1/8"x1/4" piece of strip wood.
**NOTE: if you do the siding right to the edge of the window opening, your window will no longer be the right depth you need. You'll have a tiny gap on the inside. You might need to add a little bit of strip wood around the window frame. I'll show photos in the interior post. To avoid this you could do your siding right to the edge of your window trim instead, but then your cuts have to be perfect...


4. Trim Details:
I added black trim to each balcony and roof line.As mentioned in the paneling section, because I added 3/32” paneling to the third floor exterior wall the glass railing overextended the length of my roof top floor. To compensate for this I added 1/8x1/4" strip would around the entire edge of my roof top balcony. This first piece lined up with the height of the dollhouse floor. Now because I wanted to hide the raw edge of my flooring sheet I was adding on top I added an additional piece of 1/8x1/4” strip wood. I glued it slightly more elevated than the first so that it sat flush with my added flooring sheet. Essentially it created a two layer edge of painted strip wood around the entire perimeter.
I also added trim around my roof edges to hide the raw edge of my flooring sheets. I used 1/2" x 1/6" basswood strip wood painted black.
To finish off the roof overhang above the front door I added a sheet of black cardstock to cover the channels and holes I made for my LED lights.
Trim colour: Onyx by Benjamin Moore

1/8"x1/4" strip wood around the balcony perimeter

Finished example of how the two layer of offset 1/4” x 1/8” Strip wood looks around balcony

1/2" x 1/16" strip wood around the roof edges

Black cardstock to cover my light wiring
5. Corner Moulding:

6. Component Assembly:

Door Trim:
To remove the door for staining or painting, I used pilers to pull out the nail at the bottom of the door frame so the door was free. I then took apart my door and door trim by blowing hot air from a blow dryer on the wood parts. The heat will allow the original glue to melt and the pieces can be pulled apart. This is helpful to remove the transom window and the door glass so you can paint without ruining the plexiglass. Once painted glue back the pieces as they were.


7. Foundation:


8. Back of House
I painted the inset balcony area with Kendal Charcoal, stained the door Colonial, and added wood paneling to the floor.


9. Side of House
I made it so all my electrical ran out the side of my house. I used 3/8" + 1/2" U channel moulding to hide the wiring, and fed it into a shed I made. More details in the lighting post. I also added #7601 miniature meter boxes.


10. Landscaping:
I cut a large 1/2” sheet of birch plywood to place the Urban Town dollhouse on. This way I could add ground cover and place the entire thing on a turntable. I used course salt to add snow to the entire diorama since I wanted it to be temporary. For accessories from Miniatures.com I added #88636 patio chairs, #42460 pillows, a #54599 work table, #57048 fancy planters, #44328 Poinsettia, #48617 snow shovel, #58571 toboggan sled, and a #55261 Christmas wreath to the front door. For plants I used the #948 hedge along the front of the dollhouse as well as #11800 little garden fancy bushes along the side. To complete the look I used some Lemax Christmas village style snow birch trees from Michaels.
I made a “concrete slab” walkway with large rectangles I cut from 3/32 basswood. I painted those Cement Gray to match the rest of the foundation.


Hi, Angie, here! Thanks so much for these detailed instructions! Now I will no longer have an abandoned cart at Miniatures.com. Was waiting to see if I could handle the exterior as you have so nicely demonstrated here! You rock, my friend!
ReplyDeleteThank you! I really appreciate that! I tried my best to explain, but let me know if you need more clarification. I did a video of the whole thing, but I might not get that together for a few weeks yet. I plan to get the lighting tutorial up this weekend.
DeleteOverall, you can make the exterior as complicated or uncomplicated as you like. I think just even using paint will really highlight the modern exterior. I hope the panel template helps you, I did think a utility knife and some basswood will work fine to cut them out.
I love this house, just ordered it yesterday. Can't wait for the details on the inside! Thanks so much for sharing the process.
Deletei want to see inside☹️
ReplyDeleteahhhh all the photos are on IG but I'll have to upload them here
DeleteHi there! Im having a hard time with the sliding door, it came in pieces. Are there any instructions on how to assemble? Im stuck!!
ReplyDeleteOh no! okay I'll see if I can take photos for you of one. I have a deadline tomorrow so I might have to get a photo for you sunday. Are you on IG or FB at all? I need to figure out where to send you all the photos.
Delete